Posts

Showing posts from January, 2020

Story board workshop

Image
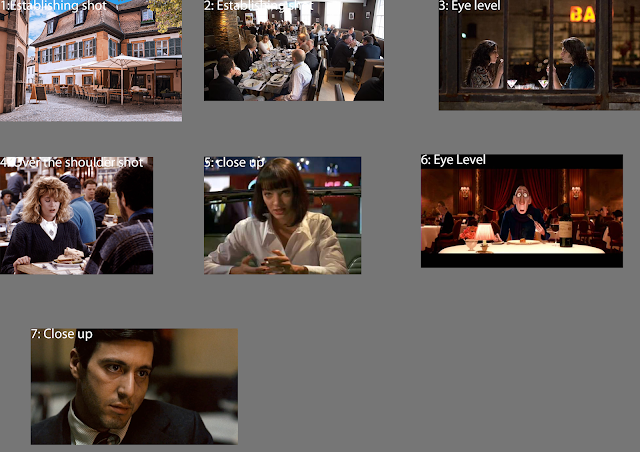
Story boarding is essential for this unit and as of such we had a story boarding workshop to show us the ins and outs for it. The main basics include putting the frames in the right format, drawing outside the frames if necessary, using arrows to show what directions the characters or camera is moving as well as just being quick. Story boarding is slightly different then writing a story as its all just about drawing the individual shots in the right places with the right angle and instructions, these are not final but rather a rough guide for the filming. The first exercise was meant to get us in the right frame of mind for this purpose. We had to find an example of an animation, film or music video and right down in detail what kind of shot it is, camera movement (if necessary) and roughly what is happening in the scene. For this I chose the music video for my favorite song called Iron by Wood kid. The second exercise was very different from the first. We had to construct a rough

Life Drawing session 11

Image
This being the first life drawing session we have had since Christmas I thought I would be rusty but apparently not. Compared to when I started this course I feel my ability to draw the human figure has increased by leaps and bounds. My proportions have gotten much more accurate and I am able to draw the model in the right pose in a relatively short amount of time. The head is still giving me trouble but I do now know how to construct the head from a circle thanks to me trying to learn how for the current project but actually adding facial features is still difficult. Usually for live drawing I start with the hips but it may be easier to start with the head instead that I can work down from. The other problem I have is being able to make the subject look like a 3D image rather than a 2D one. This will mostly be down to lines and shading to get that effect.

Environment exterior influence map

Image

Audition lesson 1

The first audition lesson was mainly about going over the basics of how the program works. It being an Adobe program, it works very similarly to the rest. There is two views, one focuses on just one sound clip and editing it is destructive editing which cant be changed. The other view is used to layer multiple sound clips together which isn't destructive editing and is a lot like editing footage in premier together. We also had the opportunity to use the microphones to get the sound clips.

Character Design workshop 1

Image
The first character design lesson focused on a lot of the basics when it comes to creating characters which includes understanding the character you are making before drawing them. Otherwise we looked at different character archetypes such as the hero or villain, different styles that could be used to draw them, the different shapes that can be used to draw a particular kind of character as well as body proportions. In terms of styles they range from making a character very realistic to being more cartoony which was demonstrated in the first exercise. At random we where given characters that we had to take from one end of the spectrum to the other. I was given danger mouse that was very cartoony so I had to make him more realistic. The main differences from the two styles is that the realistic approach involves making the head smaller, using more complex shapes and realistic body proportions. The second exercise revolved more around shapes. Characters with square shapes lo

Life drawing session 10

Image

Throwing animation

Image
In this lesson we had to animate a character throwing a object. Firstly by doing a soft throw and then a longer throw.

Intro to Premier Pro

The first part of the lesson was mainly about getting comfortable about how to move about in premier and how the software it self works. Clips being used in premier are not saved but linked to so the footage and sound has to be in the same file. The footage in this case are several explosions that have been edited so they are shorter and had some transitions applied. Dissolve transitions are the only ones that are used here. The footage is rendered by pressing enter on the keyboard and exported in a H.264 format.  For the second part we mainly looked at creating effects using keynotes and moving the different footage around on the same screen. The keynotes used include shrinking and rotating footage as well as adding blur and grain. By this point I am very confident on how to use premier effectively.

Support research of the character/location/object for the script to screen project

Script to Screen Research by Charlie on Scribd

Sound designer profile: Ben Burtt

Sound Designer Profile by Charlie on Scribd

Influence map for the mermaid

Image
The character I received was a mermaid so this is the influence map for them. I tried to find as many different examples as I could to get a clearer idea of what has been done with mermaids in the past. The examples here include mermaids from the little mermaid, harry potter, pirates of the Caribbean and from a documentary from the history channel called mermaids the body found which was a hoax but a very convincing hoax that convinced loads of people that mermaids exist until they admitted it was a hoax. The winged creatures are traditional sirens from greek mythology that where winged creatures original but today sirens are seen as the same creature as mermaids.

Using crane and Dolly in Maya

In the first video I was using an artificial Dolly to move the camera from one place to another. Dollys are often used in film making to provide a platform for the camera to be mounted on as well as having a track so the camera can move between several positions at a fast speed without it shaking in the process. Crane shots as shown in the second picture are performed in a similar way except the camera is mounted on the end of a crane that is also on a mounted platform, these don't always have tracks but they allow fro the camera to reach a high perspective without shaking the camera in the process.

Using the pitch shot in Maya

Using the Roll shot in Maya

Using the panning shot in Maya

Todays lesson was about looking at different camera shots and applying them in maya, the first of which was the panning shot. The panning shot is simply moving the camera from left to right or vice versa as can be seen in this scene. Here the camera is rigged and has extra channels for different movements. One of which is labeled as pan which was used here by first creating a keynote for where the character first emerges with the camera pointing at them. I then did the same on the frame where the character goes through the door, for every frame in between the camera will move from facing one door to the other door.

Influence map for the Piano

Image
This is the influence map for the prop which is a piano. I tried to find a variety of different Piano in terms of shapes and materials as possible.

Influence map for the Steel Mill

Image
Here is the influence map for the Steel mill that will be used as the environment for the script. I have redesigned the influence board to make it slightly different from last terms ones by mainly centering the text and adding a grey background. I didn't know what a steel mill actually looked like until now but as the name suggests its where steel is made from iron and carbon. The images I used are a mixture of phots from a steel mill and several paintings as well which surprised me that there where so many of them. From what I can tell an actual operation steel mill has a lot of smoke from the chimneys coming off the top and has lots of pockets of bright orange where there are molten materials and fire. It resembles a maze of metal, pipes and walk ways in my opinion which I could represent in the concept painting.

Introduction to the From script to screen project

Second project we where given is the From script to screen project where the main goal is to create a script for two minutes worth of animation along with a pre-visualization of the animation. Similar to the soundscape project the main elements of the animations in terms of the character, location and prop where given to us randomly. The character I was given is a mermaid , the scene a steel mill and the prop was a piano . These three elements couldn't be more different from each other if you tried but I suppose thats the main challenge of this project to take three random elements and mash them together to make a story where they are all relevant. Along with the previously mentioned script I also need to make concept art from the three elements and a animatic that both of which I have done in the past by this point so I don't see any problems there. The pre-visualizations is the sam as the animatic but done in 3D via Maya which along with the actual script it self is where I

Introduction to the Soundscapes project

Image
One of the two new projects we where given as called soundscapes where we have to create a thirty second sound track for each of these images consisting of sound effects. The actual images are random for each person depending on what number we drew, my number was 27 which gave me these three. The sound effects can not be pre recorded which means they all need to be made from scratch by first collecting the sounds and editing them using adobe audition which is Photoshop but for music. Initial impressions of the images are that they are very different from anything I have seen before and they are also easy to interpret in different ways as well. Picture one sort of looks like it could be rain on a window but the blue color and consistency looks like it could sound like sludge, that said I am also seeing shapes where yellow parts are that remind me of plants or spores. The second picture is more than likely of microscopic life forms which for some reason reminds me of sea life wi

Finishing the chicken coop in Maya

Image
This is the finished render of the chicken coop that has been textured and had a sky added along with a light wrap. All of the textures where made in photoshop using the UV's as a template so the right textures appeared in the right places. The barn and coop textures consisted of some distorted lines added while the floor uses textures to separate the lighter parts from the darker ones as well as have some dots added. The actual sky was made in Maya using a sky dome with a gradient added to separate the different shades of blue however, this also adds a blue tinge on the environment so the sky was rendered and saved as a separate image from the actual scene. In photoshop they where put on two separate layers.